Overview & Pedagogical Objective
The Studio is where deliberate shadowing practice happens. Unlike passive listening apps, the Studio provides a full recording and comparison loop: you record your spoken take, compare it waveform-by-waveform against the native reference, and systematically advance through scaffolding stages that progressively remove support until you can reproduce the dialogue from acoustic memory alone.
This guide walks you through every Studio feature in the order you will encounter them during a real rehearsal session:
Annotated View → Listen → Echoic Mode → Record Take → A/B Compare → Pin Milestone → Advance StageScaffolding Stage Entry: Annotated View
On your first listen, focus exclusively on the overall dialogue melody — where pitch rises, where it falls, and where the speaker pauses to breathe. Suppress the urge to track individual words.
Open the tech-standup-blocker scenario. The workstation starts in Continuous Mode with the Annotated scaffolding stage active. Press Space to play through the entire dialogue once without stopping.
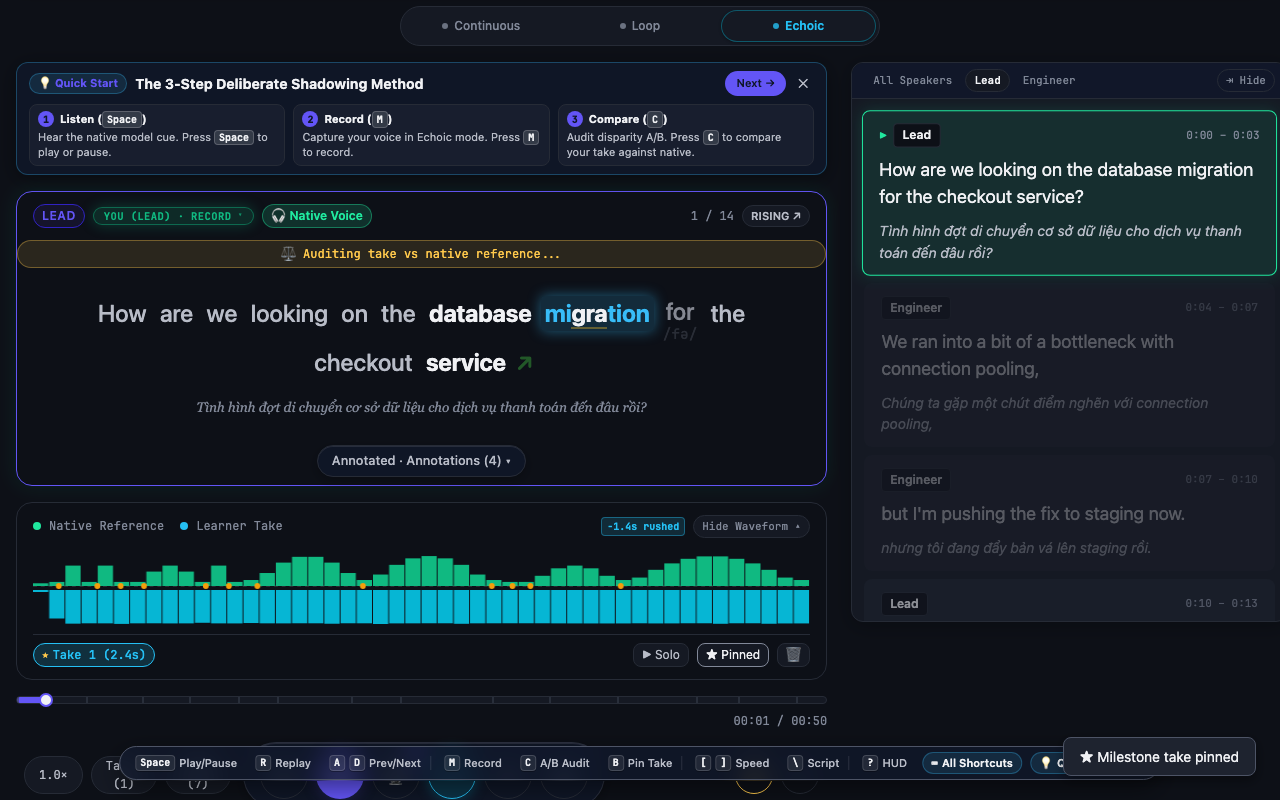
When you open a scenario, the Studio loads in the Annotated scaffolding stage — the fully supported view where all phonological annotations are visible:
- Bold syllable stress (
*stand*-up,pre*sent*ation) marks the primary beat of each word. - Linking arcs (
stand~up,it~is) show where consonants blend across word boundaries. - Elision brackets (
bi[t] of,nex[t] week) show sounds that are weakened or dropped in natural speech. - Reduced form annotations (
for{fə},them{əm}) show how function words compress at conversational speed. - Pitch contour badges (↗ Rising, ↘ Falling, ↗↘ Fall-Rise) show the intonation shape of each dialogue turn.
Use this stage for your first one or two passive listens. Then you are ready to record.
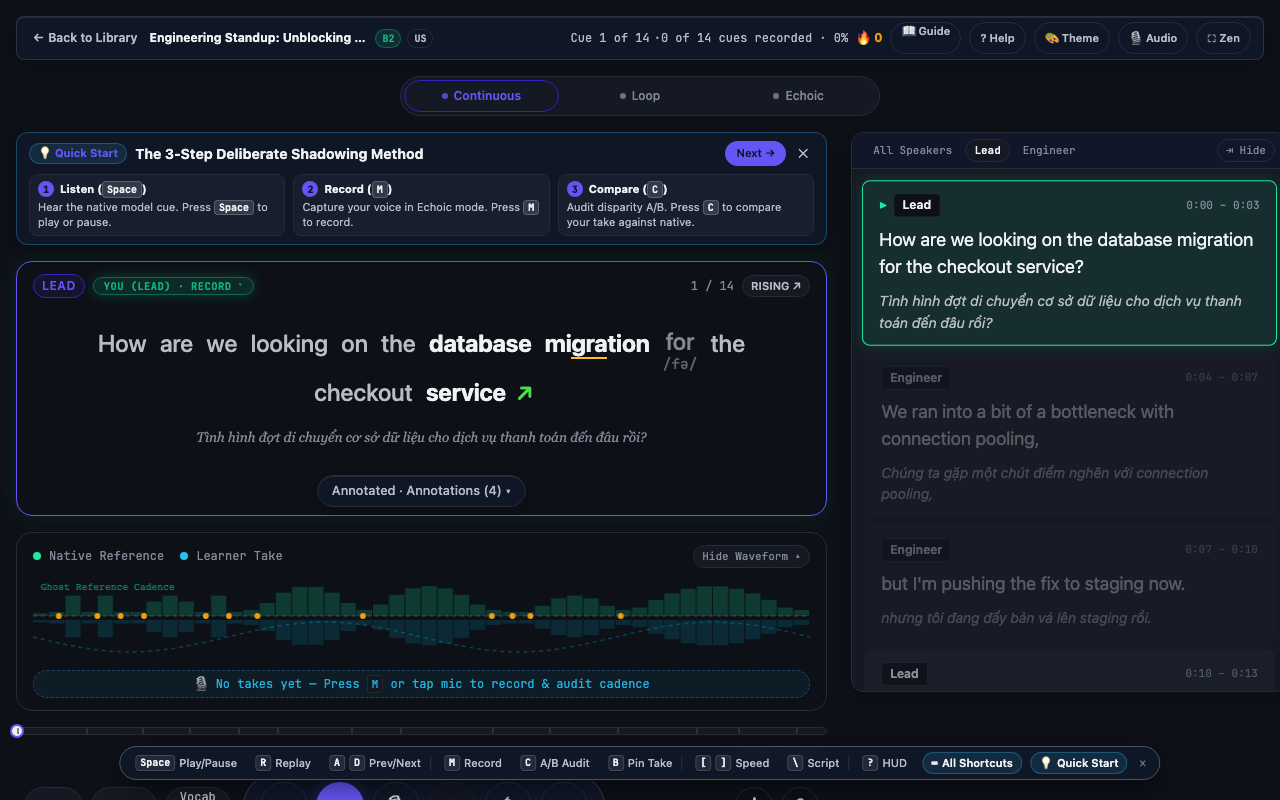
The annotations — stress markers (**word**), linking arcs (word~word), elision brackets (bi[t]), and pitch contour badges (↗ ↘ ↗↘) — are coaching aids, not scripts. Read them once to understand the phonological structure, then close your eyes for the second listen.
Reading annotations word-by-word like subtitles while listening. This activates your visual-text processing pathway instead of your auditory pathway — the two compete, and the auditory signal loses. Look at the badges, not the words.
Engage Echoic Mode: Cue Isolation & Turn-Taking
In Echoic Mode, the player isolates a single cue. Before recording, listen to that cue play once. Identify: (1) where the pitch goes at the end — up or down? (2) Which word carries the strongest stress? (3) Is there a linking boundary before the final word?
Press Tab or click the Echoic mode tab at the top of the player. The cue selector advances to the first dialogue turn. The transport bar shows Record Take button and countdown indicators.
Echoic Mode transforms the Studio from a passive player into an active rehearsal engine. In this mode:
- Only the active cue plays — not the full dialogue stream.
- After playback, the workstation enters an automated echoic pause: a silence window equal to
cue duration × 1.6 + 1.2 seconds. This pause is calibrated to match the natural duration of auditory working memory — the window during which the acoustic echo of what you just heard is still vivid enough to imitate. - The microphone is pre-armed during the echoic pause so recording can begin instantly without clicking.
The echoic pause is the most important design detail in the Studio. Do not let it go to waste — speak into it.
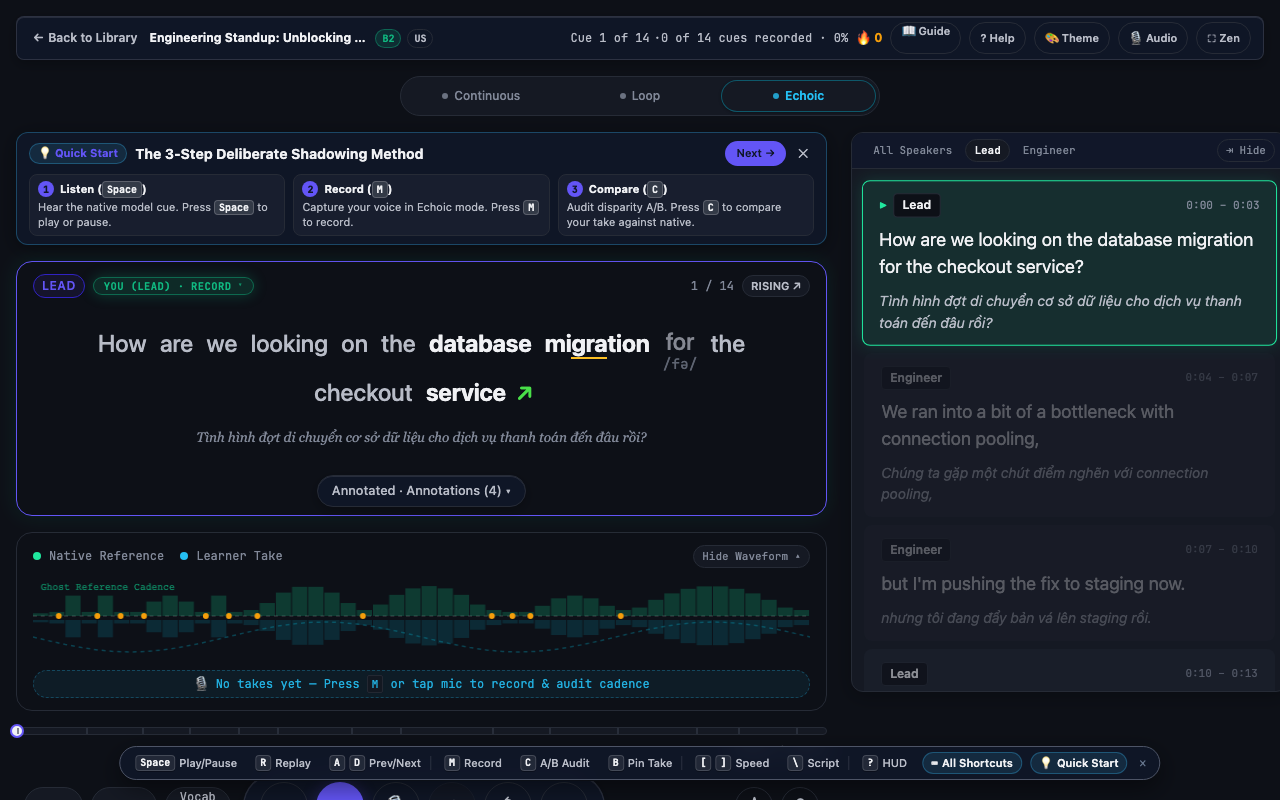
Use the ← → arrow keys to navigate to a cue you found difficult during the passive Continuous Mode listen. You do not need to start from Cue 1 every session — target your weakest cues first while your attention is freshest.
Switching to Echoic Mode before completing at least one full Continuous Mode listen. The Echoic phase requires a clear acoustic reference model. Without it, you are guessing at the target rather than comparing against it.
Recording Your Take: R Key, Waveform Canvas & Mic Distance
As you record, shadow the cue's intonation *direction* — not just its words. If the native cue ends with a falling pitch (↘), your take should end on a downward tone. Let the contour badge be your target, not the transcript text.
Press R to start recording (or let the automated countdown trigger capture). Speak the cue aloud at conversational volume. The live waveform canvas shows your input signal in real time. Press R again to stop recording.
Recording begins the moment you press R (or when the automated echoic countdown expires). The waveform canvas shows your live input signal — a rolling oscilloscope display that gives immediate visual feedback on:
- Signal level — too quiet (flat line) or too loud (clipped peaks) are both problems.
- Timing — you can see whether your take aligns with the expected cue duration.
- Silence gaps — visible as flat sections, indicating hesitation or breath-hold pauses.
Press R again to stop recording. The Studio instantly finalizes your take and saves it to the local IndexedDB Takes Vault — zero network transmission, zero cloud storage. The vault holds up to 200MB of recorded audio, with 30-day auto-eviction for unpinned takes.
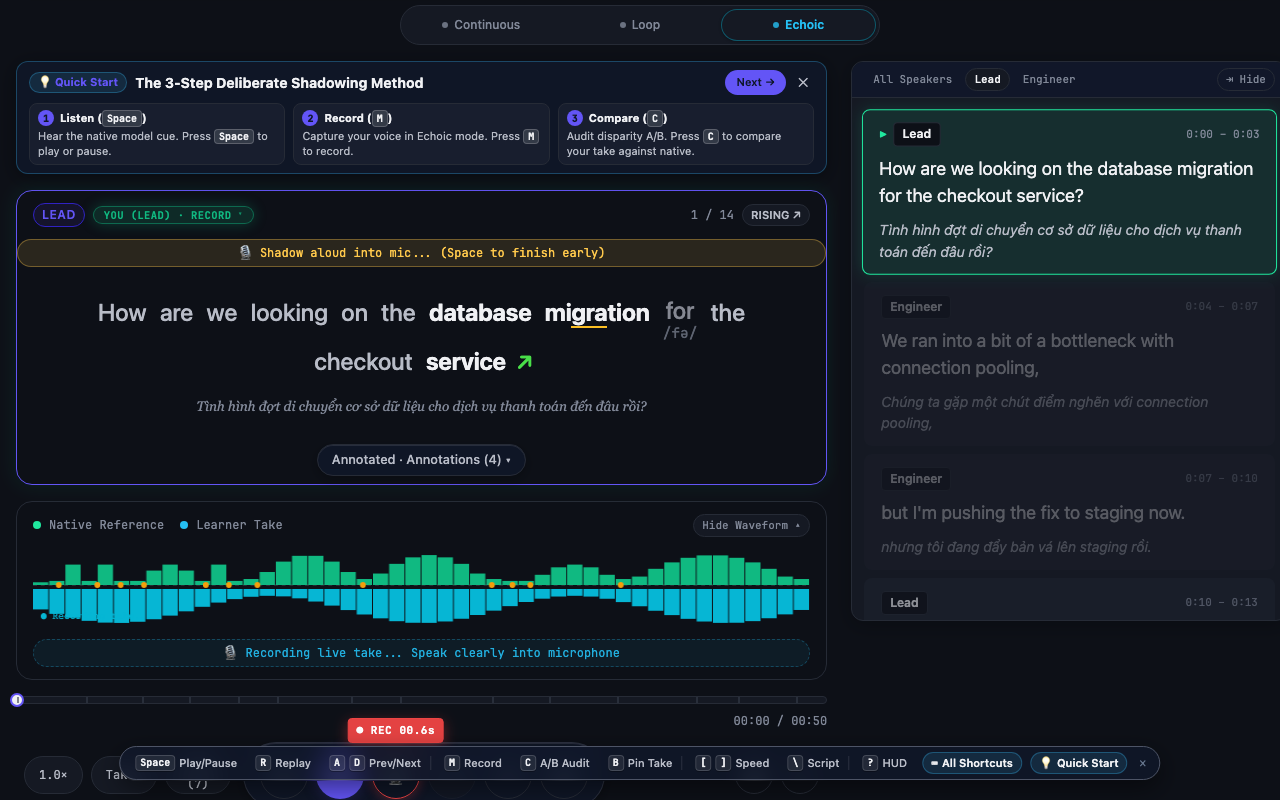
Position your microphone 15–20cm from your mouth at a slight angle (not directly in front). This reduces plosive pops ('p', 'b', 't') while maintaining warmth. The waveform canvas will show a clean, consistent signal when mic placement is correct.
Recording too quietly to 'be polite' or avoid disturbing others. A weak microphone signal produces a poor waveform that cannot be meaningfully compared to the native reference. Use headphones in shared spaces — the mic will still capture your voice at full volume.
A/B Auditory Disparity Compare: Hearing the Difference
During the A/B sequence, run three focused listening passes: Pass 1 — overall rhythm and pause placement. Pass 2 — intonation direction at the phrase boundary (↗ or ↘). Pass 3 — consonant linking and vowel reduction accuracy.
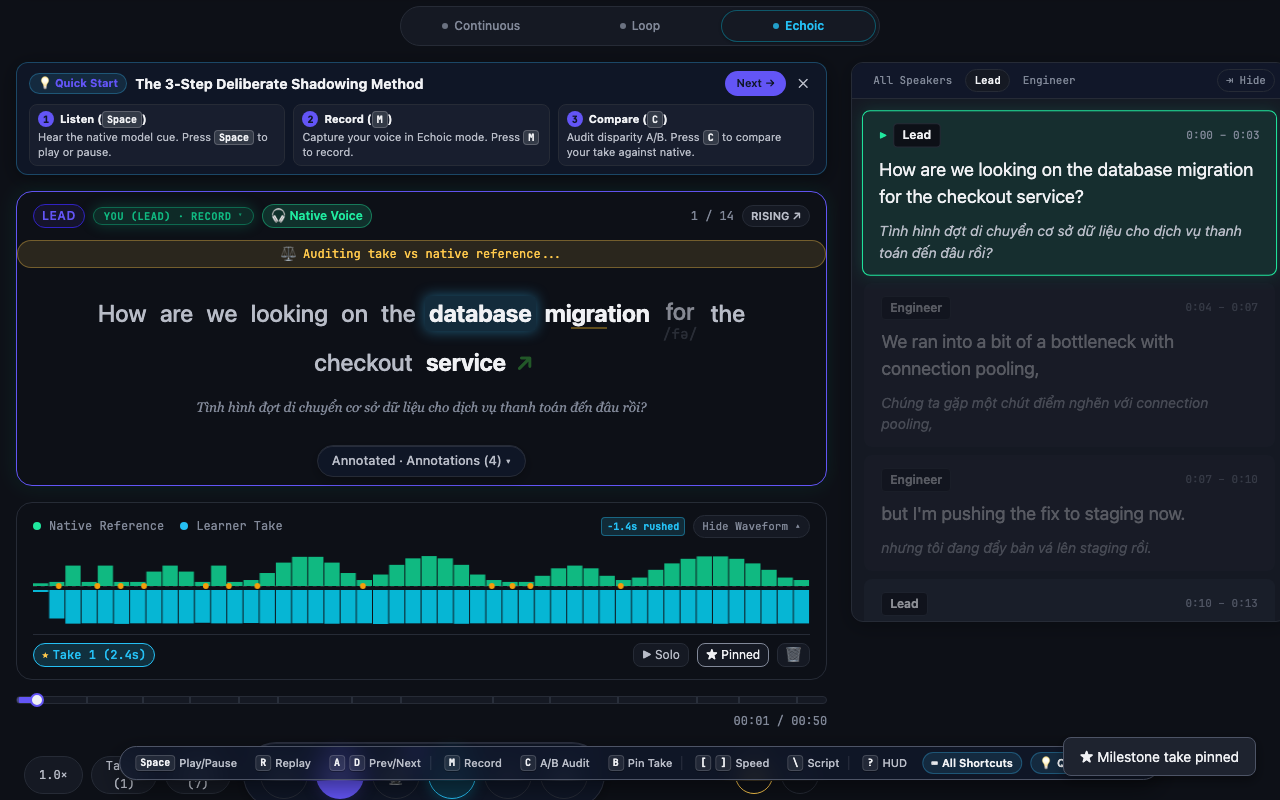
Press A or click Compare Take to launch the A/B sequence: Native Reference plays → 150ms inter-stimulus interval → Your Take plays. The waveform display switches to overlay mode, showing both signals simultaneously.
The A/B Auditory Disparity comparison is the core feedback mechanism of the Studio. When you press A, the playback sequence is:
[Native Reference] → [150ms ISI] → [Your Take]This sequence plays on loop until you press A again to stop. The 150ms Inter-Stimulus Interval is calibrated at the boundary of auditory working memory — long enough to register as a distinct take transition, short enough that the two signals blend in your perceptual stream, making differences immediately detectable.
During overlay mode, the waveform canvas renders both signals in contrasting colors. Look for:
- Timing offsets — is your take consistently earlier or later than the native?
- Amplitude envelope shape — does your energy peak on the same syllable as the native?
- Duration mismatch — is your take significantly longer or shorter?
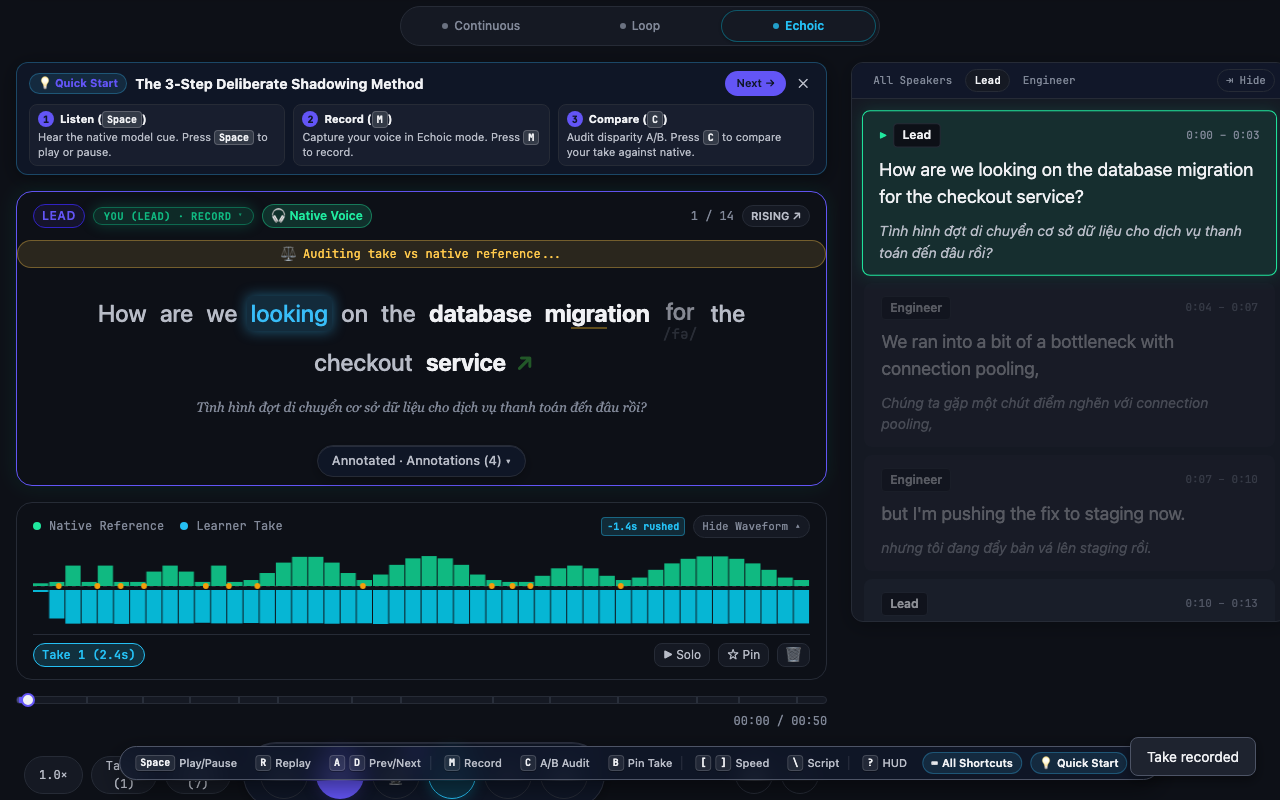
The 150ms inter-stimulus interval (ISI) between the native and your take is deliberately short — short enough that your auditory working memory still holds the native signal when your take begins. This short gap is what makes the comparison perceptually vivid.
Comparing the waveform visually instead of listening. The waveform overlay is a reference tool — the primary comparison channel is *auditory*. Close your eyes during the A/B playback and listen with full attention before glancing at the display.
Milestone Pin: Protecting Your Best Takes
Before pinning a take, run one final A/B comparison specifically listening for whether the take represents a genuine acoustic improvement over your previous attempts. Pin evidence of progress, not convenience.
After completing a take you are proud of, press P or click the Pin icon in the Takes Deck. Pinned takes are marked with a gold pin badge and are permanently exempt from the 30-day auto-eviction cycle.
The Takes Vault stores every recorded take locally on your device in IndexedDB, organized by [scenarioId, cueIndex, timestamp]. The vault has two categories:
Unpinned takes — automatically evicted after 30 days. This keeps the vault clean and prevents quota exhaustion from accumulating thousands of casual practice recordings.
Pinned milestone takes — permanently preserved, immune to auto-eviction. These are your evidence of progress. The vault quota guard (200MB) applies to the total of all takes — pinned takes count toward this quota but are never deleted automatically.
When you export your practice history (Settings → Export Backup), all pinned takes are included in the backup archive along with your SRS progress data. Unpinned takes are not exported — by design, they are ephemeral practice artifacts.
Pin sparingly — treat milestone takes like photographic evidence of a skill breakthrough. One pinned take per cue per month is a healthy pace. A vault full of pinned takes loses its meaning as a progress marker.
Forgetting to pin before closing the browser tab. The 30-day auto-eviction timer starts from the *recording* timestamp, not from when you last listened. If you record a great take on Day 1 and come back on Day 31, it will already be gone.
ScaffoldingStage Progression: Annotated → Clean → Blurred → Duet
Each stage advancement increases the acoustic demand. In Clean stage, you must rely on acoustic memory rather than written cues. In Blurred stage, only pitch contour badges are visible. In Duet stage, you perform the full dialogue from memory — no text at all.
When you can consistently produce takes that score 'Good' or better in A/B comparison for 3–5 consecutive cues in a given stage, use the Stage Advance button (or Settings → Scaffolding) to move to the next stage.
The ScaffoldingStage progression is the long-game arc of Studio mastery. Each stage systematically removes one layer of visual support:
| Stage | What’s visible | What’s hidden |
|---|---|---|
| Annotated | All annotations + pitch badges | Nothing |
| Clean | Plain dialogue text + pitch badges | Stress, linking, elision markers |
| Blurred | Pitch contour badges only | All text |
| Duet | Cue timing markers only | All text and badges |
Annotated is where you learn the structure. Clean tests phonological retention without annotation crutches. Blurred forces pure acoustic-to-motor mapping — you hear the cue and reproduce it without any textual scaffold. Duet is the performance stage: you play the dialogue as a live partner, responding to each native cue from memory alone.
Advancing through all four stages for a complete scenario represents mastery of that dialogue. At Duet stage, you are not reading — you are listening and speaking.
The transition from Annotated to Clean is the hardest scaffolding jump. Expect your A/B comparison accuracy to drop noticeably on the first Clean session — this is normal. The regression is temporary; the long-term retention gain is permanent.
Advancing stages based on confidence rather than A/B comparison evidence. 'I feel like I know this cue' is not sufficient. Run three consecutive A/B comparisons and grade all three as Good or Mastered before advancing.